Making Your Own Infused Finishing Oils

Imagine drizzling a bright, garlic-infused olive oil over a bowl of warm pasta or a piece of grilled salmon and realizing you can't go back to plain oil. Making your own infused finishing oils allows you to control the quality of your ingredients and create custom flavor profiles that you simply won't find on a grocery store shelf. This guide covers the specific techniques for infusing oils safely, the best base oils to use, and how to store your creations so they stay fresh and flavorful.
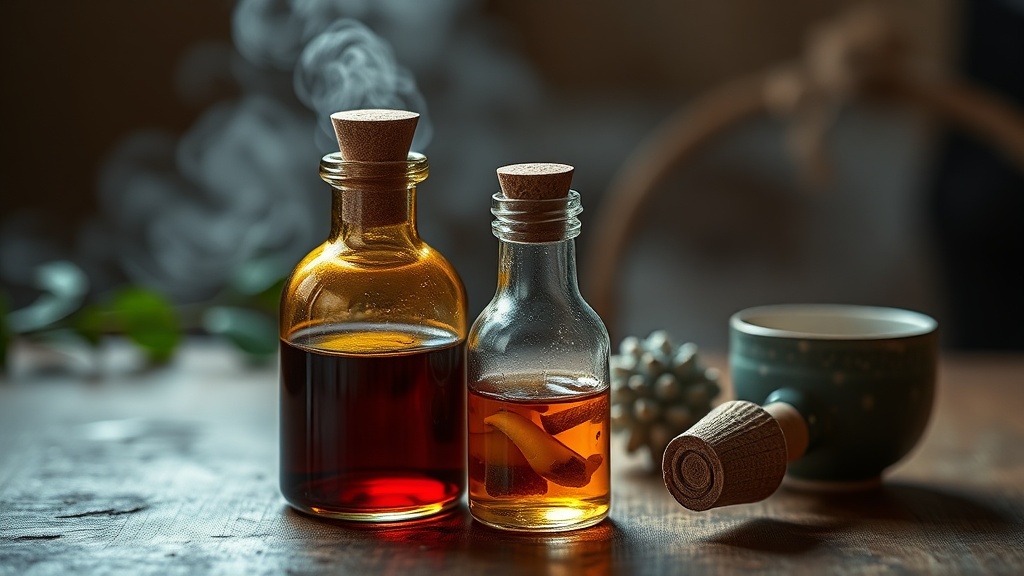
The difference between a mediocre meal and a professional-grade dish often comes down to the very last step: the finish. A high-quality finishing oil—whether it's chili oil, herb oil, or citrus-infused oil—adds a layer of complexity that salt and pepper alone can't provide.
What is the Safest Way to Infuse Oil at Home?
The safest way to infuse oil at home is to use a heat-controlled method or a short-term room temperature method with dried ingredients to avoid the risk of botulism. While it's tempting to throw fresh garlic or herbs into a jar of oil and leave it on the counter, doing so creates an anaerobic environment where Clostridium botulinum can thrive. This is a serious food safety concern.
To keep things safe, you have two main paths: the cold infusion or the gentle heat method. If you use fresh ingredients, you must keep the oil refrigerated and use it within a few days. If you want it to sit in your pantry, stick to dried spices or use a heat method to drive out moisture.
For those who want to be extra cautious, I always recommend checking the CDC guidelines on foodborne illnesses. It’s not worth the risk of a bad batch.
The Heat Method (The "Warm" Infusion)
This is my preferred way to get deep flavor quickly. You aren't "frying" the ingredients; you are gently warming the oil to extract the essences.
- Choose your vessel: Use a heavy-bottomed saucepan or a double boiler.
- Combine: Add your base oil and your aromatics (like peppercorns or dried chili flakes).
- Heat: Keep the temperature below 200°F (93°C). If you have a digital thermometer, use it.
- Wait: Let the oil sit on the lowest setting for about 30 to 60 minutes.
- Strain: Use a fine-mesh sieve or cheesecloth to remove all solids.
If you're using a slow cooker, you can also do this on the "warm" setting, but keep a close eye on it. You don't want to scorch the oil, or it will taste bitter and burnt.
Which Base Oil Should I Use for Infusions?
The best base oil depends entirely on whether you plan to use the finished product as a cold finishing oil or a warm cooking oil. For a finishing oil meant to be drizzled over a finished dish, a high-quality extra virgin olive oil or a neutral oil like avocado oil works best.
Here is a quick breakdown of how different oils behave:
| Oil Type | Flavor Profile | Best Use Case |
|---|---|---|
| Extra Virgin Olive Oil | Rich, peppery, or fruity | Drizzling over pasta, bread, or vegetables |
| Avocado Oil | Neutral, buttery | High-heat infusions or subtle herb flavors |
| Grapeseed Oil | Light, neutral | Citrus or delicate herb infusions |
| Toasted Sesame Oil | Nutty, intense | Asian-inspired finishing (don't heat too much!) |
If you are making a chili oil to use for stir-fry or dipping, I suggest starting with a neutral oil like grapeseed. It allows the heat of the chili to be the star without the heavy, grassy taste of olive oil getting in the way. Also, don't forget that if you're using spices, you can look into different spice profiles to find the perfect match for your base.
How Do I Store Infused Oils Properly?
You should store infused oils in a cool, dark place or in the refrigerator if they contain fresh ingredients. The goal is to prevent light, heat, and oxygen from oxidizing the oil and making it go rancid.
If you made a "cold" infusion using fresh garlic or fresh herbs, it must go in the refrigerator. Even then, I wouldn't let it sit for more than a week. For long-term storage, always use dried ingredients and store the oil in a dark-colored glass bottle. Amber or cobalt glass is great for protecting the oil from light exposure.
One thing to note—don't use plastic containers. Plastic can leach flavors into the oil, and it doesn't provide the same airtight seal that glass does. If you're using a high-end oil, like a premium cold-pressed olive oil, treat it with respect and keep it away from the stove.
Common Mistakes to Avoid
- Using too much moisture: If you use fresh herbs, make sure they are bone-dry after washing. Any water left on the leaves will cause the oil to spoil.
- Overheating: If the oil starts smoking, you've gone too far. You'll lose the delicate flavors of the ingredients.
- Ignoring the smell: If the oil smells "off" or like old paint, throw it away. That's a sign of rancidity.
If you're already experimenting with flavors in your kitchen, you might enjoy exploring unique spice combinations to see how they interact with different fats. It's a fun way to build your palate.
I once tried to make a lemon-zest oil using a microwave. It was a disaster. The oil heated unevenly, and the zest became bitter and gray. Please, use a stove or a double boiler instead. It takes a few more minutes, but the results are infinitely better.
When you're ready to use your oil, start small. A few drops of a homemade rosemary-garlic oil can transform a simple roasted potato into something special. It's all about that final touch. If you've already mastered your coffee-making technique and want to move into more complex kitchen gear, you'll find that precision matters just as much in oil-making as it does in a pour-over.
The beauty of this process is the experimentation. One month you're making a spicy Calabrian chili oil, and the next, a subtle vanilla-infused oil for a dessert. Just remember: keep it dry, keep it cool, and keep it safe.
Steps
- 1
Select Your Base Oil
- 2
Prepare Your Aromatics
- 3
Gently Heat the Mixture
- 4
Cool and Store Properly