How to Brew Perfect Pour-Over Coffee at Home Like a Barista

Pour-over coffee delivers a clean, nuanced cup that highlights the unique characteristics of single-origin beans. This guide breaks down the equipment, techniques, and timing needed to replicate café-quality results on a kitchen counter — no espresso machine required. Whether upgrading from an automatic drip brewer or refining an existing routine, these steps cover everything from water temperature to pour patterns.
What Equipment Do You Need for Pour-Over Coffee?
You'll need four basics: a dripper, filters, a grinder, and a kettle. The rest — scale, timer, thermometer — make consistency easier but aren't mandatory.
The Hario V60 dominates home kitchens for good reason. Its cone shape and single large hole give you total control over flow rate. Ceramic retains heat beautifully; plastic is nearly indestructible (and cheaper). The Chemex serves double duty as brewer and serving carafe — its thick paper filters produce an exceptionally clean cup, though the proprietary filters cost more. For something sturdier, the Blue Bottle Dripper uses a flat bed and unique vacuum design that forgives minor technique errors.
Don't skimp on the grinder. The Baratza Encore remains the entry-level gold standard — conical burrs produce consistent particle sizes without the price tag of commercial units. Blade grinders chop beans unevenly, creating dust that over-extracts and chunks that under-extract. That's a recipe for bitter, hollow coffee.
Water matters too. The Fellow Stagg EKG electric kettle heats precisely and pours with surgical control. A standard kettle works — you'll just need a thermometer and a steady hand.
| Equipment | Budget Pick | Upgrade Pick | Why It Matters |
|---|---|---|---|
| Dripper | Hario V60 Plastic ($10) | Chemex 6-Cup ($45) | Shape affects extraction and flavor clarity |
| Grinder | Timemore Chestnut C2 ($80) | Baratza Virtuoso+ ($250) | Consistent grind size prevents uneven extraction |
| Kettle | OXO Pour-Over Kettle ($45) | Fellow Stagg EKG ($165) | Pour control directly impacts bloom and agitation |
| Scale | AWS LB-3000 ($15) | Acaia Pearl ($150) | Precision ratios separate good from exceptional |
What's the Best Coffee-to-Water Ratio for Pour-Over?
Start with 1:16 — one gram of coffee to sixteen grams of water. This produces a balanced, approachable cup that works across most roast levels and origins.
Here's the thing: ratio isn't religion. Some baristas swear by 1:15 for a richer, more concentrated brew. Others prefer 1:17 for lighter, tea-like extractions. The roast date, bean density, and personal taste all nudge the numbers.
A standard single cup uses 20 grams of coffee to 320 grams of water. For two people, bump to 30 grams and 480 grams. Always weigh — volumetric scoops vary wildly depending on bean size and roast darkness. A light roast Ethiopian might weigh 12 grams per tablespoon; a dark French roast could hit 8 grams.
Water quality changes everything. Nashville's soft municipal water (sourced from the Cumberland River) extracts differently than the hard, mineral-heavy water in Chicago or Phoenix. If the tap tastes chlorinated or metallic, use filtered water. The Specialty Coffee Association recommends 75-250 ppm total dissolved solids — most Brita filters land in the sweet spot.
How Do You Brew Pour-Over Coffee Step by Step?
Heat water to 200°F (93°C), grind 20 grams of coffee to a medium-fine consistency (like kosher salt), rinse the filter, add grounds, bloom for 30 seconds, then pour in controlled spirals until you hit 320 grams.
Let's slow down. Start by boiling more water than needed — you'll want extra for rinsing. Place the dripper on your mug or carafe, insert the paper filter, and pour hot water through it. This removes papery taste and preheats your vessel. Dump the rinse water.
Add the ground coffee. Give the dripper a gentle shake to level the bed — uneven grounds lead to channeling where water rushes through weak spots.
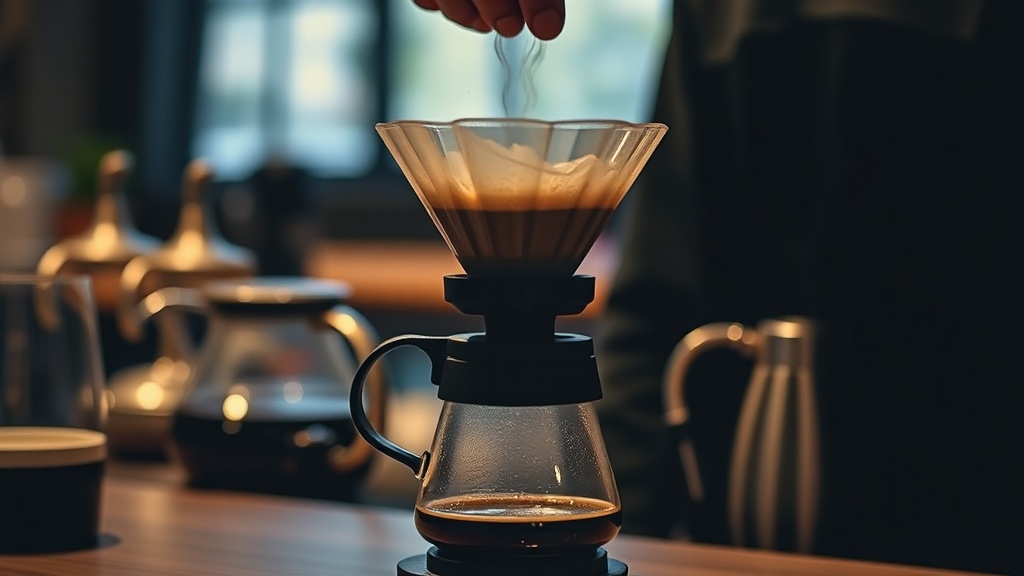
The bloom phase — pour roughly 40 grams of water in slow circles, just enough to saturate the grounds. Fresh coffee will puff up, releasing CO2 trapped during roasting. Wait 30 seconds. This isn't wasted time; carbon dioxide repels water, so letting it escape ensures even extraction later. Stale coffee barely blooms — that's your sign to buy fresher beans.
Now the main pour. Start in the center, spiral outward, then back in — never pour directly on the filter paper. Keep the water level consistent, about halfway up the slurry. The Specialty Coffee Association recommends completing your pour in 2-3 minutes total.
The Fellow Stagg EKG (or any gooseneck kettle) shines here. A standard spout dumps water too fast, creating turbulence that over-agitates the grounds. Slow, steady circles — that's the technique competitive baristas use.
Timing Your Extraction
Total brew time should land between 2:30 and 3:30. Under 2:30? Grind finer. Over 3:30? Coarsen up. Time is a diagnostic tool, not a target — taste trumps numbers.
Watch the drawdown. Coffee should flow steadily, not drip reluctantly or gush through. A flat bed at the end (no high walls of grounds stuck to the filter sides) signals even extraction. High walls mean you poured too aggressively down the edges.
What Are Common Pour-Over Mistakes?
Most home brewers struggle with grind consistency, water temperature, and pouring technique — fix these three and the improvement is immediate.
Grinding too fine chokes the filter, extending brew time and extracting bitter compounds. Grinding too coarse lets water race through, producing sour, underdeveloped coffee. The Goldilocks zone feels like coarse sand — rub some between your fingers.
Water temperature swings wildly in basic kettles. By the time you finish pouring, it might drop 15 degrees. Preheating helps, but an electric kettle with temperature hold (like the Fellow Stagg EKG or Bonavita Variable Temperature Kettle) removes guesswork. The National Coffee Association notes that water below 195°F under-extracts, while boiling water scorches delicate aromatics.
Pouring technique trips up beginners most. Here's the fix: practice with water first. No coffee, just water. Watch how the stream behaves at different heights and angles. Pour from lower for control, higher for agitation. Get the motion into muscle memory.
Stale beans ruin everything else. Coffee peaks 4-14 days post-roast. Buy from local roasters (Nashville's Barista Parlor or Frothy Monkey both roast in-house) and check roast dates. Pre-ground coffee loses volatile aromatics within hours. Grind right before brewing — the difference is stark.
How Can You Improve Your Pour-Over Technique?
Keep a simple brew log: grind setting, water temperature, pour time, and tasting notes. Patterns emerge quickly. That Ethiopian that tasted flat? It needed a finer grind. The Guatemalan that poured too fast? Try a slower, more deliberate spiral.
Experiment with agitation. Some baristas swirl the dripper after blooming to ensure even saturation. Others use a WDT tool (a thin needle or specialized distributor) to break up clumps in the grounds before adding water. Small tweaks compound.
The catch? There's no universal "perfect" cup. A bright Kenyan AA shines with a 1:17 ratio and 205°F water. A chocolatey Brazilian benefits from 1:15 and 198°F. Taste, adjust, repeat.
Clean equipment matters. Coffee oils accumulate in grinders and leave rancid flavors. Run Grindz tablets (or uncooked rice) through the grinder monthly. Rinse the dripper immediately — dried coffee residue introduces bitterness to tomorrow's brew.
Consider a Coffee Gator Digital Scale with a built-in timer. Watching weight and time simultaneously helps dial in consistency. Worth noting: even professional baristas adjust throughout the day as humidity and bean temperature change. Flexibility beats rigidity.
Pour-over rewards patience. The ritual — heating water, grinding beans, the meditative pour — transforms morning coffee from caffeine delivery into something worth waking up for. Master these fundamentals and the kitchen becomes the best café in town.
Steps
- 1
Prepare Your Equipment and Heat the Water
- 2
Grind the Beans and Bloom the Coffee
- 3
Pour in Slow Circles and Let It Drip